Shooting 16:9 with an Arriflex 16S
Taping the ground glass for widescreen filmmaking
With the advent of HD, 16:9 has replaced 4:3 as the aspect ratio of choice for many filmmakers. The Arriflex 16S, 16S/B and 16M are native 4:3 cameras. The simplicity and ruggedness incorporated into their beautiful registration movement design unfortunately makes them poor candidates for Super 16 conversion.
So how can you obtain beautiful 16:9 images from these cameras? It turns out to be really quite simple, and very cost effective.
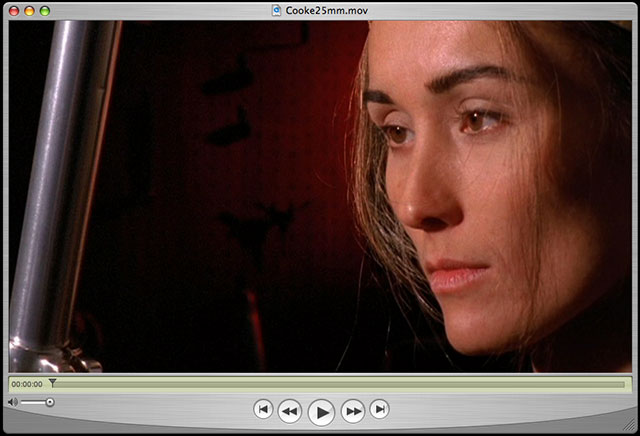
The first step is to shoot on slower film stock to keep the size of the grain to a minimum. How slow? In our experiments, if you shoot a 4:3 scene with Kodak Vision 2 200T (7217) and scan the image 16:9, the grain is comparable to the same scene shot in Super 16 with Kodak Vision 2 500T (7218) and scanned at 16:9. The still image above was shot with an Arriflex 16S on Kodak Vision 2 200T (7217).
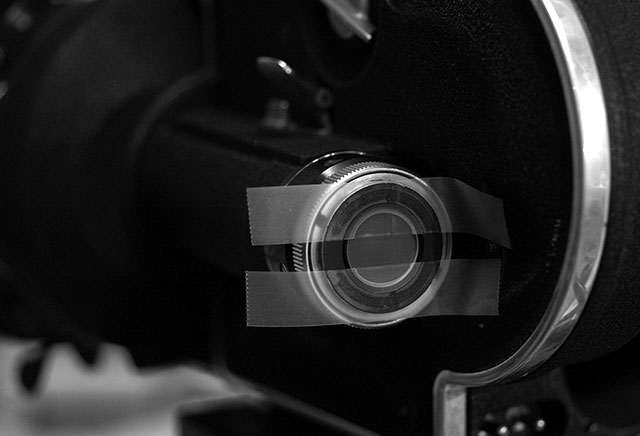
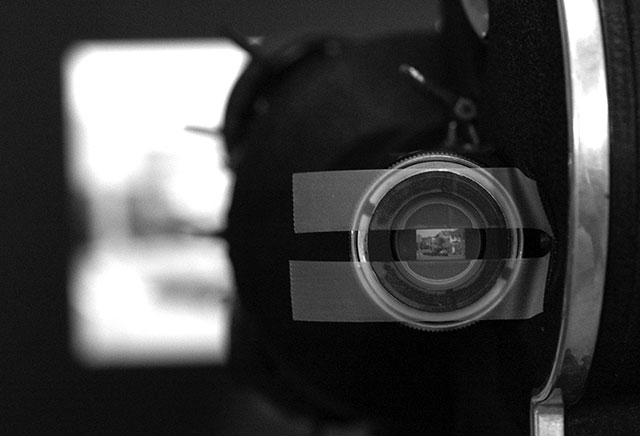
The second step is to tape the ground glass of the Arriflex camera for the 16:9 aspect ratio. Here's how you can easily do that.
Obtain a roll of 3M Scotch Brand Magic Tape. Make a 16:9 image or chart to hang on a wall or display on your computer monitor. Take the eyepiece off of your Arriflex camera (the whole eyepiece, so you can expose the ground glass, not just the eyecup (see picture)) and gently place the tape on the ground glass.
Now point the camera at the 16:9 image or chart you made.
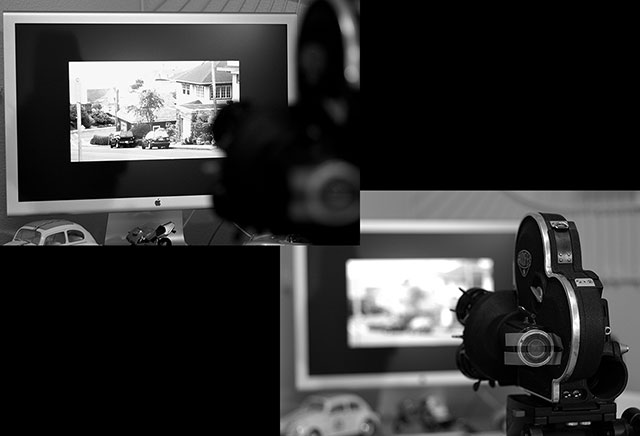
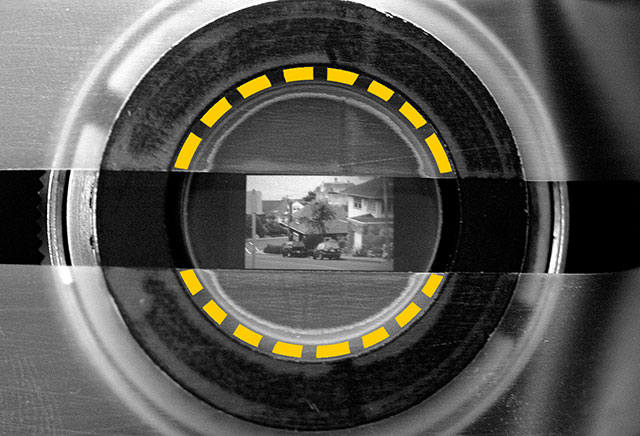
Zoom in or move in until the right and left edges of the 16:9 image touch the right and left edges of the ground glass.
Next study where the 16:9 image falls on the ground glass and carefully move the tape at the top and bottom of the frame to just touch the top and bottom edge of the image. Use care not to scratch the ground glass. Trim off the excess tape (we use an X-acto knife and trim around the outside of the ground glass, on the outside of the little metal lip that secures the ground glass in place (see the dashed yellow lines below)).
Put the eyepiece back onto the camera and focus on the 16:9 image. You may have to repeat this procedure a few times to get the tape in the exact right spot.
When finished shooting your project, remove the eyepiece and remove the tape. If any residue remains on the ground glass, remove it with a fresh piece of tape (placing it over the glass and lifting it off, the residue should lift with the tape).